
We explained about FX Brokers Arbitrage Test KIT in our article: click to read
in this article we would like to elaborate in more detail how to analyze the data obtained from the indicators
Difference Indicator
When arbitrage situation appears, difference indicator will draw bar from dots.

First of all you need to check how big difference appeared. In my example I use Min difference = 15 points and 5 dots means that difference between price on fast feed and brokers was 20 points (15+5). Red colour for dots means that difference disappeared on the same M1 candle.
Analyzing several signals, you can optimize the values of stop loss, trailing stop, take profit, but you should consider spread for each signal.
Spread Indicator
In our example Value = 4 points (0.4 pips) shows that we can set Stop Los = 0.8 (pips for standard lock arbitrage software) or 80 (points for VIP Lock Arbitrage Software version), but you should analyze several arbitrage situations to make right decision. You can also check Max and Average values.
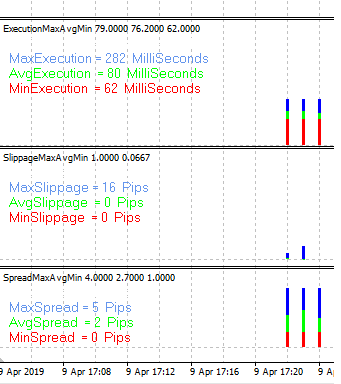
Execution time Indicator
Execution time indicator shows how long timeframe between you have sent order and when order will be executed on server. You should also check this time for arbitrage situation.

In our example execution time during arbitrage situation = 83.8 ms. To make any conclusions, you need to check this value for several arbitrage situations. You can also compare it with average value.
Usually execution time up to 250ms is good for arbitrage, but most important to check slippage due to this execution time.
Slippage Indicator
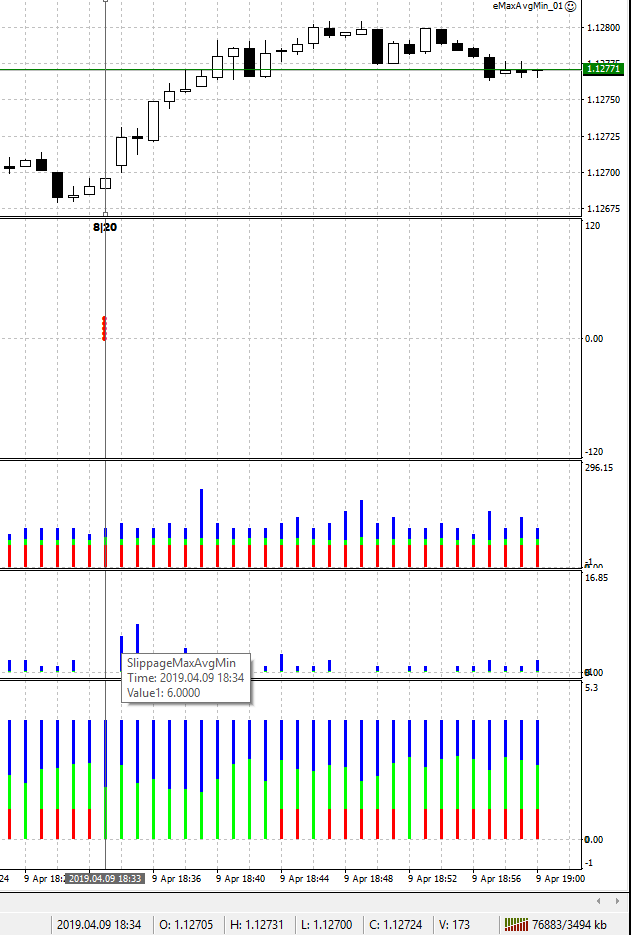
You need to check slippage on the next bar after arbitrage situation, we calculate the slippage already at that bar on which order would be executed. In our example slippage = 6 points. It means that if we send order with price 1.35000, BUY order will be executed by price: 1.35000 + 6 = 1.35006 and SELL order will be executed by price: 1.35000 - 6 = 1.34994 It helps you to analyse how slippage can affect your strategy and find the best value for min profit etc.
Usually good slippage for arbitrage between 0 and 10. Higher slippage can destroy arbitrage strategy.